|
KungFu Article
Itís not uncommon for people to choose only the most powerful techniques for street application. Excluded from this list are seemingly less powerful strikes such as the back fist, low kicks, elbows, knees and close chain strikes are chosen. Close chain strikes are the techniques which align the body in a straight line with the target, usually employing the articulation of two or more joints in the limb. Jab, cross, reverse punch, palm strike, or side kick are good examples of the close chain mechanism. Open chain strikes, on the other hand, commonly involve circular motion, such as in a back fist or a lead-leg roundhouse. Under ideal conditions, the close chain technique is more powerful than the open chain technique. With that in mind, letís take a look at what detractors of the back fist say. The statements below are not necessarily accurate, but they are commonly cited.
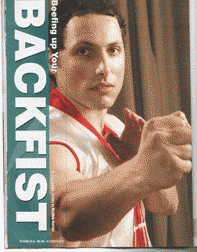
There is a good answer for each of these statements. Letís address them one at a time, going in reverse order. MMA fighters fight one opponent at a time. It is in their best interest to face their opponent at all times. Back fist requires a fighter to turn sideways to an adversary, causing unnecessary vulnerability. It is true that a close chain strike which uses a pipe formation, has less chance of bending the wrist than an open chain strike. However, if properly practiced and performed, the back fist can also be thrown with great wrist stability. Also, more wrist/hand injuries have been reported as the result of close chain punches, as opposed to open chain punches. This is because when a tough target is hit, something must give, and usually itís the wrist. Last but not least, some people make an uneducated assumption that the back fist depends solely on the force of the triceps. Although it does not hurt to have strong arms, a correctly thrown back fist combines leg power with midsection strength, exploding it through the arm. Letís take a look at the firing chain of the back fist, first assuming that the punch is thrown from the fighting stance. Both legs are slightly bent, the rear foot is on the toes, and the hands are up, guarding the face. The punch starts with the plantar flexion of the rear foot and extension of the knee and hip. In other words, your toes are pointing away from you Ė the main effort by the big toe. Your hip and knee extend in the same manner as if you were throwing a very low side kick. The plantar flexion of the foot is carried out by the muscles in the back of your lower leg, commonly known as the calf muscles. The pushing power of your leg is generated by the quadriceps (front of your thigh, hamstrings, back of tight and glutes inside an back of the hips). This is only your rear side. From there you have a transfer of force to the leading side of your trunk. All the muscles located on the punching side of the trunk are activated and this causes your trunk to lean sideways. Major players here are the extensors of the spine, obliqueís, quadratesí labarum and abdominals. Finally, the force is transferred to the shoulder. Your shoulder whips out the arm, which transfers to the contraction of the triceps extending the elbow. Right on contact, the extensors of the forearm contract to stabilize the wrist. The force is now transferred. Below are the exercises designed to increase the power of the back fist. The main focus of these exercises is on the forearm, triceps, shoulders and midsection. Legs are important, but daily stance training common among kung fu devotees should be adequate for let strength. Some exercises will emphasize the functional training of the legs, especially when the back fist is delivered with a step. The first two exercises focus on biceps strength with shoulder stabilization. Master the first exercise before moving on to the second. (Please refer to pictures shown in the excerpts from the KungFu Magazine below for reference.) 1a. Assume a pushup position, feet touching the wall. Walk your hands toward your fee until the hips are at a ninety-degree angle. 1b. Lower your elbows until they are half an inch away from the floor. Return to the starting position. Begin with a 2 sets of 5 and build up to 3 sets of 15-25 repetitions. 2a. Assume the same starting position as 1a. Walk your legs up the wall until the trunk is in line with the legs. 2b. Lower your elbows until they are half an inch away from the floor. Return to the starting position. Begin with 2 sets of 5 and build up to 3 sets of 15-25 repetitions. Exercises three and four are similar to one and two except for the fact that both are performed on the knuckles. The goal of these exercises is to emphasize the back of the forearm and the part of the triceps that are used in transferring the force of the back fist to the target. 3a. Assume the same position as 1a. Make a fist and turn the palms away from the feet. 3b. Keeping the wrist fixed, lower the elbows to the floor. Do now allow the wrist to bend. Return to the starting position. Begin with 2 sets of 5 and build up to 3 sets of 15-25 repetitions. 4a. Assume the same position as 3a. Walk your legs up the wall until the trunk is in line with the legs. 4b. Keeping the wrist and forearm in one straight line, lower the elbows to the floor. Return to the starting position. Begin with 2 sets of 5 and build up to 3 sets of 15-25 repetitions. The fifth exercise is for static stabilization. It develops the core strength necessary to perform some of the other exercises. 5. Lie face-down on the floor. Pull your toes under you. Place your forearms on the ground. Lift your body off the floor. Only the forearms and the ball of the feet should support your body weight. Begin practicing this position with 2 sets of 15-30 seconds each, with a minute break in between. Build up to 3 sets of 3 minutes each, with 15 second breaks in between. The sixth exercise strengthens the musculature of the midsection and the shoulder. One side is emphasized at a time. This exercise has a good carryover to the combat application of the back fist. The work of the deltoid is shifted from the front of the shoulder to the side and somewhat back. The midsection effort is shifted from the front of the core to the side. 6a. Assuming the above position (5a) place one arm perpendicular to the trunk and the other arm behind your back 6b. Rotate the free shoulder up and away from the floor. At the same time raise your hips and move your supporting shoulder over your supporting elbow. Return to the starting position. Start with 2 sets of 3 repetitions. Build up to 2-3 sets of 12-15 repetitions on each side. The seventh exercise works triceps, shoulders, forearms and midsection all at once. 7a. Lie face-down on the ground. Place both fists under your chest or upper abdomen. Only the knuckles should be in contact with the ground, not the whole fist. Lift your chest an inch off the fists. 7b. Press up just like a push up. At this point you may have only the knuckles in contact with the ground or the whole fist. 7c. Lift one arm straight up. The next two static exercises (8,9) strengthen the muscles on the back side of the body. Special tension is placed on the back of the shoulders and arms. Master exercise eight, then move on to exercise nine. 8. Lie down on your back. Place your elbows on raised objects. Yoga blocks are used for demonstration purposes. Lift your body off the ground. Your whole bodyweight should rest on the heels and the elbows. Start with 2 sets. Hold for as long as possible. Work until you are able to hold for one minute straight. At this point begin to place the blocks further away from each other. 9. Assume the same starting position as in 8, except this time rest the back of the hands on the blocks. Hold for as long as possible and repeat twice. Keep practicing until you are able to hold for one minute straight. The tenth exercise strengthens the shoulders as well as the core. 10a. Lie down on the side of your body. Place the bottom leg in front of the top leg. Place the bottom elbow on the floor. 10b. Press the bottom elbow into the ground and raise your torso off the ground. Start with 1 set of 3 repetitions on each side. Keep training until you are able to perform 3 sets of 12-15 repetitions on each side. The eleventh exercise is a hanging movement for developing speed and power in the leg, in case the back first is thrown from the distance. 11a. Assume a fighting stance. 11b,c. Push off with the rear leg and spring forward. The last exercise guilds the chain mechanism through the dynamic tension exercise. 12 a. Assume a fighting stance and place the extended back fist on the wall. 12b. Begin to push with your toes. Feel the tension traveling through your leg and your waist into your shoulder, arm and forearm. Return to the fighting stance position. Note: In a real situation, the forward push of the body is the immediate precursor to the punch. In this exercise, as the body leans forward, the arm bends instead of extending (as it would in an actual back fist). Remember to do this exercise slow, since you donítí want the body to incorporate it into the nervous system. Prior to and after performing this exercise, throw a few back fists, to prevent a wrong motor learning pattern from imprinting.
Best Wishes,
Paul
Pictures of exercises coming soon.
|


